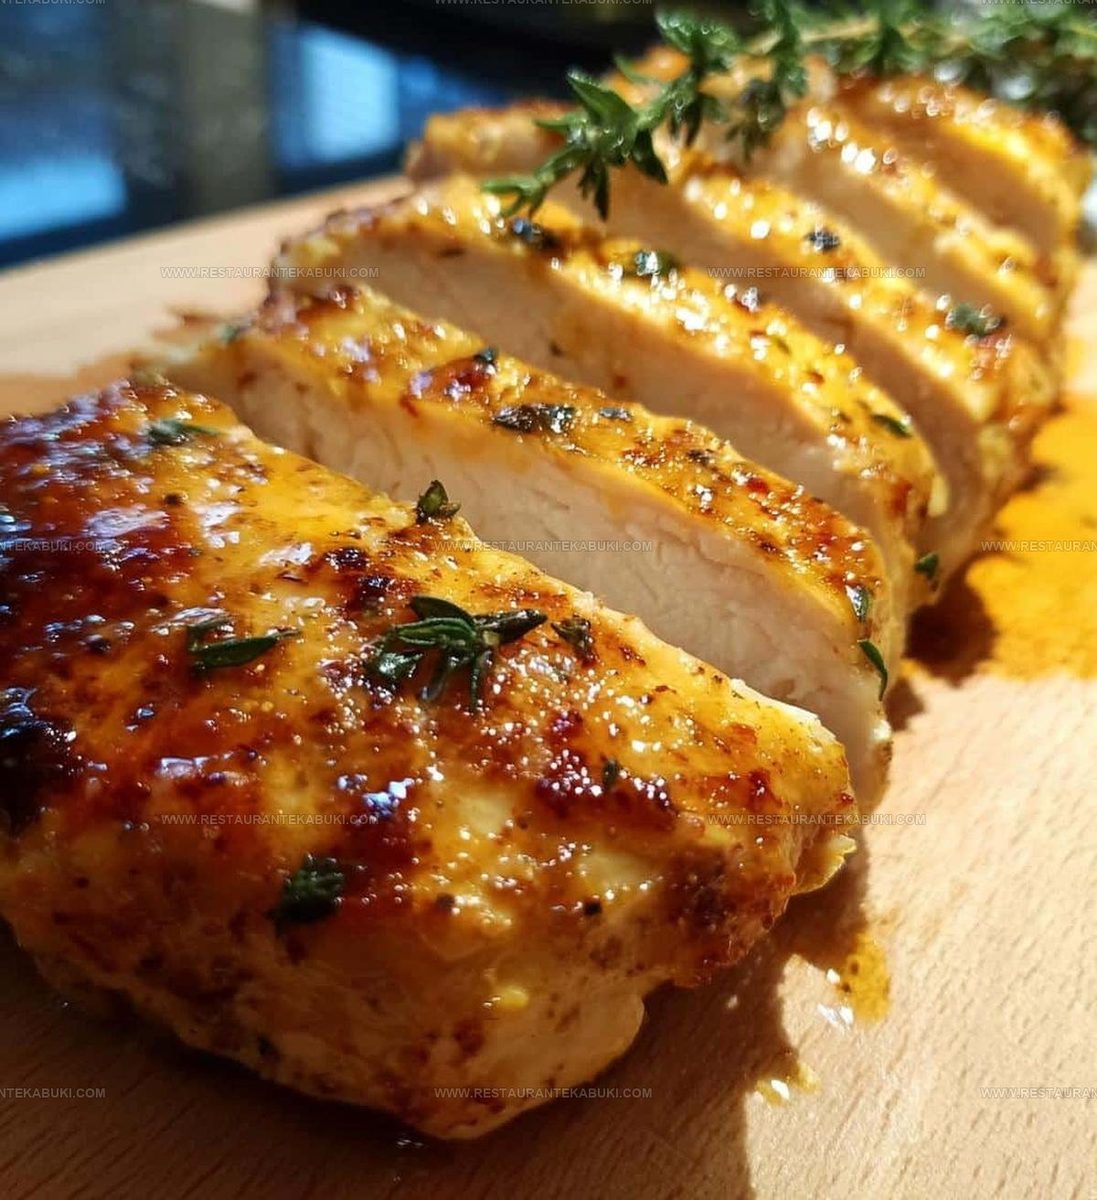
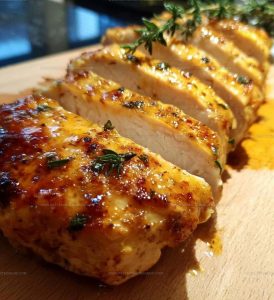
Melt-In-Your-Mouth Chicken Breast Recipe to Savor
Tender melt-in-your-mouth chicken breast recipe options prove that simple weeknight dinners can feel special without any fuss or complexity.
Perfectly cooked poultry has a way of satisfying everyone at the table, from picky eaters to food enthusiasts who appreciate well-prepared comfort meals.
Busy schedules often call for reliable main courses that deliver on flavor while keeping things straightforward and stress-free.
What makes it particularly appealing is how adaptable it becomes for different occasions, fitting seamlessly into casual family dinners or slightly more polished gatherings.
You can count on it to become a regular favorite that never feels boring or repetitive.
Success comes down to understanding a few key techniques that guarantee consistent, delicious results every time you cook.
Make it tonight and watch how quickly plates get cleared around the table.
What Keeps Melt In Your Mouth Chicken Breast a Top Choice
What Ingredients Need Picking Up For Chicken Breast
Main Protein:Seasonings And Aromatics:Melt In Your Mouth Chicken Breast Tool Collection
Clear Instructions For Chicken Breast Tender

Get Your Oven Ready
Turn on your oven and set it to 375°F. Give it a few minutes to heat up while you work on the chicken.
Make Your Flavor Mixture
In a bowl, combine these ingredients for coating the chicken:
Stir everything together until the garlic is evenly distributed throughout the oil and spices.
Prepare Your Chicken Breasts
Pat your 2 chicken breasts dry with paper towels.
This helps the coating stick better and gives you better browning. Then place each breast on a cutting board.
Apply The Coating
Take each chicken breast and rub the mixture all over it, making sure to coat both sides and the edges. Don’t be shy here; the coating is what makes the chicken tender, so get it everywhere.
Transfer To Baking Dish
Place your coated chicken breasts into a baking dish. They can sit close together, but try not to stack them on top of each other.
Bake The Chicken
Slide the dish into your 375°F oven for 25 to 30 minutes. The chicken is done when the internal temperature reaches 165°F at the thickest part.
Rest Before Serving
Take the dish out of the oven and let the chicken sit for 5 minutes. This resting period keeps your chicken juicy when you cut into it.
How to Improve Chicken Breast
Flavor Options To Try With Melt In Your Mouth Chicken Breast
Perfect Matches for Chicken Breast
How To Store Tender Chicken Breast
FAQs
Can I use frozen chicken breasts?
Thaw your chicken completely before cooking. Frozen chicken won’t cook evenly and takes much longer to reach the safe temperature.
How do I know when the chicken is done cooking?
Use a meat thermometer to check that the thickest part reaches 165°F (74°C). This ensures your chicken is safe to eat and tender.
What if I don’t have fresh thyme?
Dried thyme works just as well. Use half the amount since dried herbs are more concentrated than fresh ones.
Can I prepare the chicken ahead of time?
Mix your coating and coat the chicken up to 4 hours before baking. Keep it covered in the fridge until you’re ready to bake.
Should I cover the baking dish with foil?
No, leave it uncovered so the chicken gets a nice, light golden exterior while staying juicy inside.
What’s the purpose of resting the chicken?
Resting for 5 minutes lets the juices settle back into the meat, keeping each slice moist and tender rather than dry.
Tender Melt-In-Your-Mouth Chicken Breast Recipe
- Total Time: 35-40 minutes
- Yield: 2 1x
Description
Melt in your mouth chicken breast is what happens when you pound the meat thin, coat it lightly, and sear it quickly in a hot pan until it’s tender and juicy inside. Simple seasonings and a quick pan sauce tie everything together so you get restaurant-quality chicken for weeknight dinner.
Ingredients
Main ingredients:
- 2 chicken breasts
Cooking fat:
- 1/4 cup olive oil
Seasonings and aromatics:
- 2 cloves garlic, minced
- 1 teaspoon salt
- 1/2 teaspoon black pepper
- 1 teaspoon paprika
- 1 teaspoon dried thyme
- 1 tablespoon lemon juice
Instructions
- Set your oven to 375°F and let it heat while you prepare everything else.
- Combine 1/4 cup olive oil, 2 minced garlic cloves, 1 teaspoon salt, 1/2 teaspoon black pepper, 1 teaspoon paprika, 1 teaspoon dried thyme, and 1 tablespoon lemon juice in a bowl.
- Pat your 2 chicken breasts dry with paper towels so the coating sticks better.
- Rub the oil mixture all over both sides of each chicken breast until they’re evenly coated.
- Transfer your coated chicken to a baking dish, arranging them so they don’t overlap.
- Bake at 375°F for 25 to 30 minutes until the internal temperature reaches 165°F when you check the thickest part.
- Take the chicken out and set it aside for 5 minutes so the juices redistribute throughout your meat before cutting into it.
Notes
- Pound your chicken breasts to an even thickness of about three-quarters of an inch so they cook uniformly and stay moist throughout the baking time.
- Don’t skip the resting period after baking, as it allows the juices to redistribute through the meat and makes each bite more tender.
- Use fresh lemon juice rather than bottled for a brighter flavor that complements the garlic and herbs better.
- If your chicken breasts are particularly thick, add an extra 5-10 minutes to the baking time and check that the thickest part reaches 165°F on a meat thermometer for food safety.
- Prep Time: 10 minutes
- Cook Time: 25-30 minutes
- Category: Baked Chicken
- Method: Baking
- Cuisine: American
Nutrition
- Serving Size: 2
- Calories: 562 kcal
- Sugar: 0.4 g
- Sodium: 1163 mg
- Fat: 39 g
- Saturated Fat: 5.3 g
- Unsaturated Fat: 33.7 g
- Trans Fat: 0 g
- Carbohydrates: 1.9 g
- Fiber: 0.8 g
- Protein: 43 g
- Cholesterol: 124 mg
Kaiden Poole
Co-Founder & Culinary Story Specialist
Expertise
Global Cuisine Inspiration, Cooking Techniques, Cross-Culture Fusion, Food Trends & Recipe Innovation, Flavor Storytelling, Food Writing, Creative Seasonal Menus
Education
- Program: Culinary Arts Certificate (Professional Cook 1 & 2)
- Focus: Fundamental kitchen techniques, food safety, menu planning, and real-world kitchen experience.
Online Gastronomy & Food Culture Courses (Various Platforms)Kaiden Poole brings global influence and culinary storytelling to the team. Based in Vancouver, BC, he earned his Culinary Arts Certificate from Vancouver Island University and expanded his knowledge through studies in gastronomy, nutrition, and sustainability. He focuses on cross-cultural flavors and creative fusion, crafting recipes that make international cuisine accessible to home cooks. For Kaiden, food is about curiosity, creativity, and connection around the table.