Juicy Rotisserie Chicken Recipe for Sunday Dinner
Rotisserie chicken recipe magic happens when golden, crispy skin meets tender meat that falls right off the bone.
Few meals match the comfort and satisfaction of a perfectly cooked bird spinning its way to juicy perfection.
The aroma alone fills any kitchen with warmth and makes everyone gather around in anticipation.
This cooking method has earned its reputation for good reason – it delivers consistent results that feel both impressive and effortlessly homemade.
Weeknight dinners suddenly feel special, and weekend gatherings become memorable without demanding hours of active attention.
What seems like an elaborate dish actually comes together with minimal fuss and maximum flavor.
Time to roll up your sleeves and create something that turns any meal into a celebration.
Why Rotisserie Chicken Is Always a Good Idea?
What You Need For Rotisserie Chicken
Main Protein:Seasonings And Oil:Rotisserie Chicken Tool List
Complete Instructions For Rotisserie Chicken
Get Your Oven Ready
Heat your oven to 375°F and give it a few minutes to reach that temperature. This ensures the chicken heats evenly when it goes in.
Prepare Your Chicken
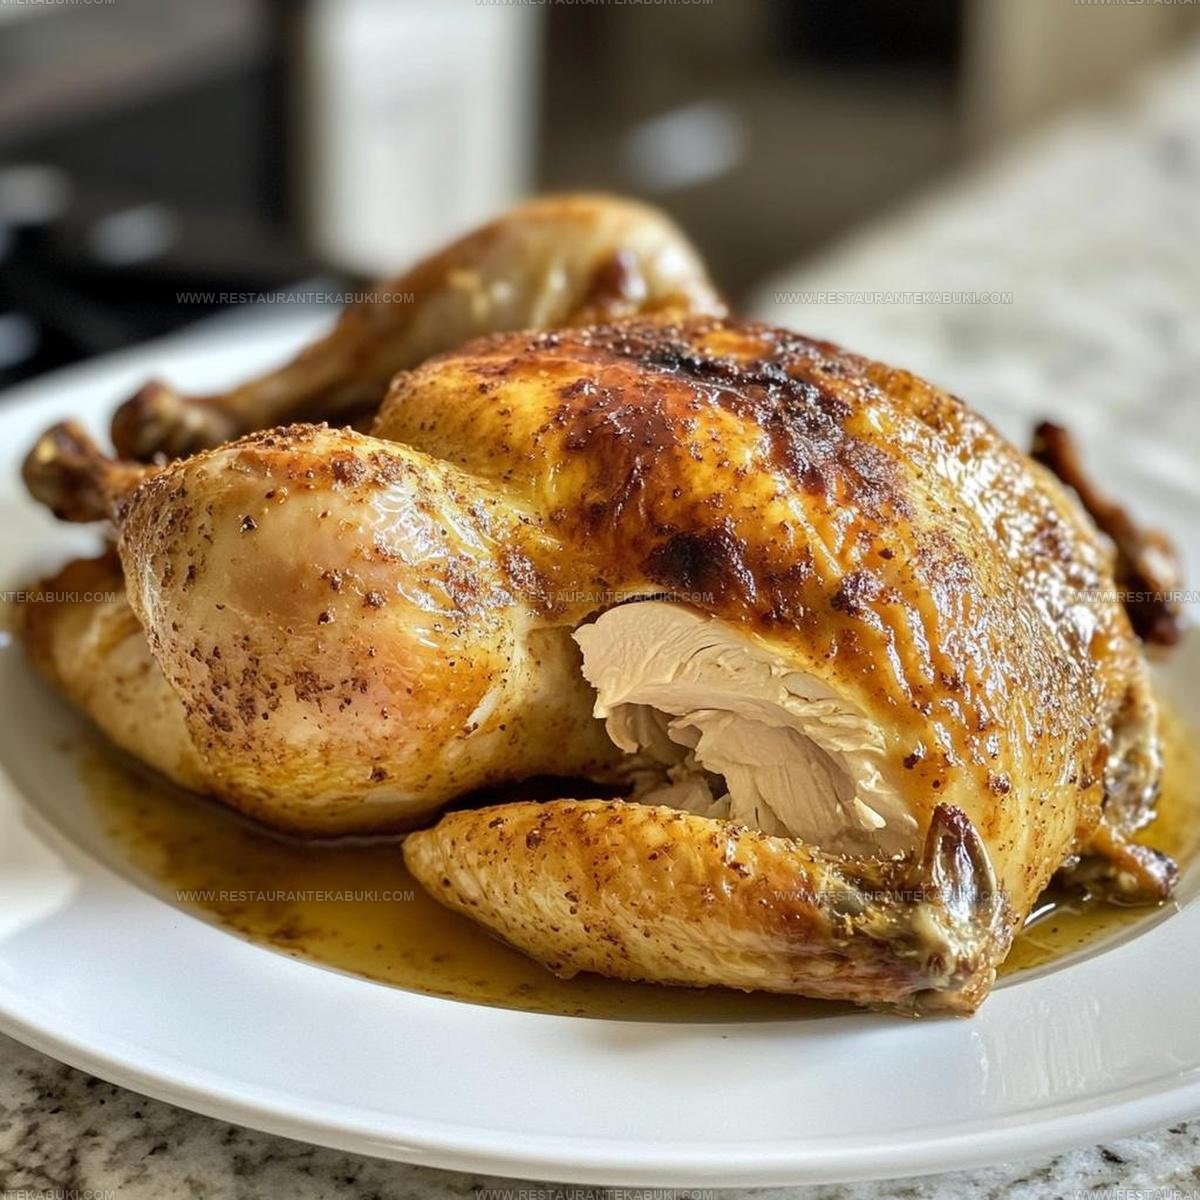
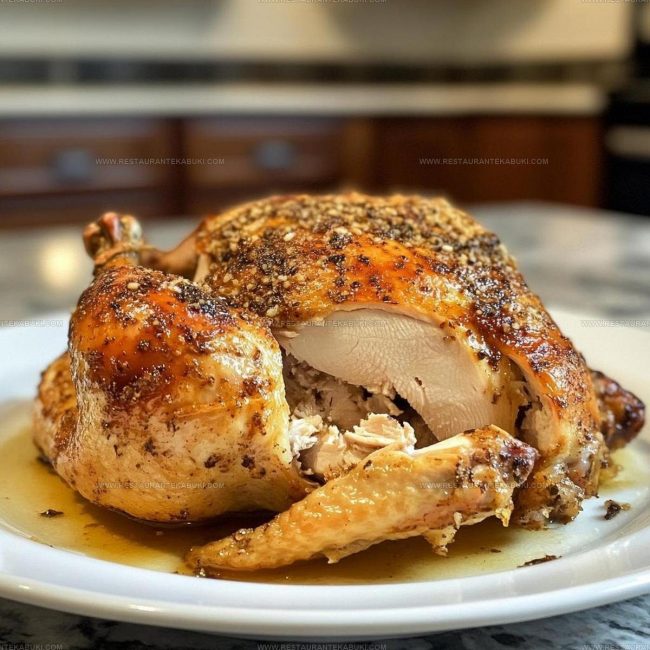
Take the rotisserie chicken out of its packaging and place it directly on a baking sheet. Position it so it sits flat and has room around it for the heat to circulate.
Season The Bird
Drizzle 1 tbsp of olive oil all over your chicken, making sure to coat different parts. Then sprinkle your seasonings across the surface:
Rub these seasonings gently into the skin so they stick and distribute evenly.
Warm It Through
Place your seasoned chicken in the 375°F oven for 15 minutes. This time allows the exterior to get a bit crispy while the inside heats all the way through. Check that the skin looks golden and feels warm when you touch it.
Plate And Serve
Remove the chicken from the oven and let it rest on the baking sheet for a minute before transferring it to a serving plate. Pair it with whatever sides appeal to you, whether that’s vegetables, rice, or potatoes.
What Are Simple Cooking Tips For Rotisserie Chicken
How to Customize Rotisserie Chicken
How Can Rotisserie Chicken Be Plated
Top Storage Tips For Rotisserie Chicken
FAQs
Can I use a frozen rotisserie chicken?
Thaw your chicken completely before baking. A frozen chicken takes longer to heat through and won’t get crispy skin on the outside.
Do I need to add oil to the chicken?
Yes, drizzling olive oil helps the skin get crispy and keeps the meat from drying out while it bakes.
What if my chicken isn’t crispy after 15 minutes?
Your oven might run cooler than average. Check if the skin looks golden brown, and bake for a few extra minutes if needed until it reaches that color.
Can I skip any of the seasonings?
The salt, pepper, garlic powder, and paprika work together to boost flavor. Skipping salt will make the chicken taste flat, but other seasonings can be adjusted to match what your family enjoys.
Is the baking step necessary if the chicken is already cooked?
Yes, baking at 375°F reheats it evenly and crisps up the skin. This step takes just 15 minutes and makes a real difference in texture.
Should I cover the baking sheet with foil?
Leaving it uncovered lets the skin crisp up nicely. Skip the foil for the best results.

Rotisserie Chicken Recipe
- Total Time: 20 minutes
- Yield: 4 1x
Description
Quick and easy rotisserie chicken recipes give you a shortcut to weeknight dinners that come together in minutes when you grab a bird from the store. From tacos to salads to pasta, that rotisserie chicken becomes your secret weapon for getting a hot meal on your table without the fuss.
Ingredients
Base Ingredients:
- 1 store-bought rotisserie chicken
Seasonings and Oils:
- 1 tablespoon olive oil
- 1 teaspoon salt
- 1 teaspoon black pepper
- 1 teaspoon garlic powder
- 1 teaspoon paprika
Instructions
- Heat your oven to 375°F so everything is ready when you need it.
- Take your rotisserie chicken out of its packaging and set it on a baking sheet.
- Drizzle 1 tablespoon of olive oil all over the chicken, making sure your coating is even.
- Sprinkle 1 teaspoon of salt, 1 teaspoon of black pepper, 1 teaspoon of garlic powder, and 1 teaspoon of paprika across the entire bird.
- Slide the baking sheet into your preheated 375°F oven and let it warm for 15 minutes until the skin turns crispy and everything is heated through.
- Pull the chicken from the oven and transfer it to a serving plate alongside whatever sides you’ve prepared.
Notes
- Rotisserie chicken from the store comes already cooked, so you just need to reheat it gently to keep the meat moist rather than drying it out.
- A quick brush of olive oil before baking helps restore the skin’s crispiness that may have softened during storage.
- If you’re short on time, skip the oven entirely and shred the meat right from the package to toss into salads, tacos, or grain bowls for an instant meal.
- For a gluten-free version, double-check that your seasonings are certified gluten-free, since some spice blends contain hidden additives.
- Prep Time: 5 minutes
- Cook Time: 15 minutes
- Category: Baked Chicken
- Method: Baking
- Cuisine: American
Nutrition
- Serving Size: 4
- Calories: 225 kcal
- Sugar: 0 g
- Sodium: 600 mg
- Fat: 13 g
- Saturated Fat: 3.5 g
- Unsaturated Fat: 8.5 g
- Trans Fat: 0 g
- Carbohydrates: 1 g
- Fiber: 0.2 g
- Protein: 26 g
- Cholesterol: 75 mg
Kaiden Poole
Co-Founder & Culinary Story Specialist
Expertise
Global Cuisine Inspiration, Cooking Techniques, Cross-Culture Fusion, Food Trends & Recipe Innovation, Flavor Storytelling, Food Writing, Creative Seasonal Menus
Education
- Program: Culinary Arts Certificate (Professional Cook 1 & 2)
- Focus: Fundamental kitchen techniques, food safety, menu planning, and real-world kitchen experience.
Online Gastronomy & Food Culture Courses (Various Platforms)Kaiden Poole brings global influence and culinary storytelling to the team. Based in Vancouver, BC, he earned his Culinary Arts Certificate from Vancouver Island University and expanded his knowledge through studies in gastronomy, nutrition, and sustainability. He focuses on cross-cultural flavors and creative fusion, crafting recipes that make international cuisine accessible to home cooks. For Kaiden, food is about curiosity, creativity, and connection around the table.