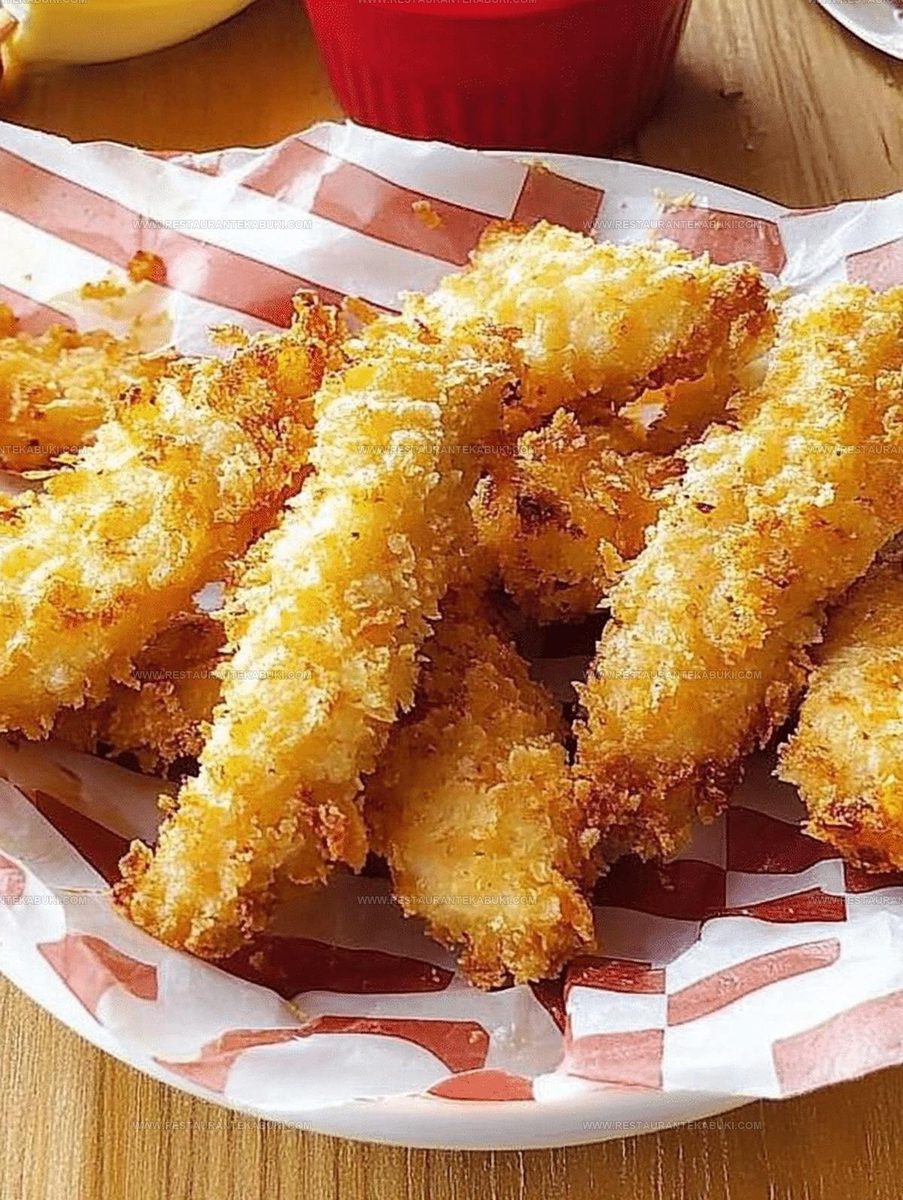
Crunchy Potato Chip Chicken Strips Recipe That Pops
Potato chip chicken strips bring a satisfying crunch that goes far beyond what ordinary breading ever could.
Something about the salty, crispy coating makes every bite feel like a fun and exciting treat.
It's the kind of meal that earns instant approval from even the pickiest eaters at the table.
Casual weeknight dinners suddenly feel a little more special with a platter of these on the table.
Simple to pull off yet impressive in flavor, it fits perfectly into any home cook's rotation.
Plate them up and watch them disappear faster than you'd ever expect.
The Pull of Potato Chip Chicken Strips
Which Ingredients Will Be Combined in Potato Chip Chicken Strips
Chicken And Coating Base:Seasonings And Flavorings:Cooking Oil:Potato Chip Chicken Strips Tool Collection
Preparation Directions For Potato Chip Chicken Strips
Heat Your Oven
Start by setting your oven to 400°F and lining a baking sheet with parchment paper. This gives your chicken strips a place to cook evenly, and the parchment keeps cleanup simple for you.
Prepare Your Coating Stations
Grab three shallow dishes or bowls and set them up in a row. Each one serves a different purpose in your breading process, so having them ready makes things flow smoothly when you start coating.
Mix Your Seasoned Flour
In your first dish, combine these ingredients together:
Stir everything together so the seasonings spread evenly through the flour, giving your chicken flavor in every bite.
Beat Your Eggs
Crack 2 large eggs into your second dish and beat them together until they’re combined and slightly frothy.
This coating helps everything stick to your chicken pieces.
Crush Your Potato Chips
Pour 2 cups of potato chips into your third dish and crush them with your hands or the bottom of a glass until they reach a breadcrumb-like texture.
Slightly larger pieces work fine too, so don’t worry about making them too fine.
Cut Your Chicken
Take 1 pound of chicken breast and slice it into strips about 1/2 inch thick.
Cutting them yourself rather than buying pre-cut pieces gives you control over the size, which matters for even cooking.
Coat Each Strip in Flour
Take a chicken strip and dredge it through your seasoned flour mixture, pressing it gently so the coating clings to both sides.
Shake off any excess flour back into the dish, and set the coated strip aside on a clean plate.
Dip in Egg Wash
Pick up your floured chicken strip and dip it into the beaten egg, making sure both sides get covered.
Let any drips fall back into the bowl before moving to the next step.
Press Into Potato Chips
Place your egg-coated strip into the crushed potato chips and press down gently, flipping it over so the chip coating covers all the surfaces.
The pressure helps the chips stick, creating that satisfying crunch.
Arrange on Baking Sheet
Place each coated strip onto your prepared baking sheet, spacing them so they don’t touch.
This allows heat to circulate around each piece during cooking.
Bake Your Chicken
Put your baking sheet in the preheated 400°F oven for 20 to 25 minutes until the coating turns golden brown and the chicken is cooked through.
Check that the thickest piece reaches 165°F inside with a meat thermometer.
Cool Slightly Before Serving
Remove the baking sheet from the oven and let your strips sit for a couple minutes.
This brief rest helps the coating set up nicely so it stays crispy on your plate.
What Are Essential Cooking Tips For Potato Chip Chicken Strips
Variations for Potato Chip Chicken Strips
Ways To Plate Potato Chip Chicken Strips Nicely
Smooth Storage Suggestions For Potato Chip Chicken Strips
FAQs
Can I use any type of potato chips for the coating?
Different chip flavors work great, so feel free to pick your favorites. Classic salted chips give you a basic crispy coating, while barbecue or ranch flavored chips add extra taste to your chicken strips.
What if my chicken strips are thick and unevenly sized?
Pound them to an even thickness before breading so they cook at the same rate. This prevents thin pieces from drying out while thicker ones are still cooking through.
Should I crush the potato chips fine or leave them chunky?
Leave some texture in your crushed chips; chunky pieces create a crunchier, more interesting coating than a fine powder.
Can I prepare the breaded strips ahead of time?
Yes, bread them and refrigerate on a plate for up to 4 hours before cooking. The cold coating sticks better and gives you a crispier result.
How do I know when the chicken is fully cooked inside?
A meat thermometer reading 165°F (74°C) in the thickest part tells you it’s done. If the coating browns too fast, lower your heat slightly.

Potato Chip Chicken Strips Recipe
- Total Time: 35-40 minutes (baking) or 23-25 minutes (frying)
- Yield: 4 1x
Description
Potato chip chicken strips are what happens when you coat crispy, crunchy coating around tender chicken that turns golden in the pan. Your family gets restaurant-quality chicken with that satisfying crunch in just minutes.
Ingredients
Proteins:
- 1 pound chicken breast, cut into strips
- 2 large eggs
Coatings:
- 2 cups potato chips, crushed
- 1 cup all-purpose flour
Seasonings and cooking fat:
- 1 teaspoon garlic powder
- 1 teaspoon onion powder
- 1 teaspoon paprika
- Salt and pepper to taste
- Oil for frying (vegetable or canola)
Instructions
- Heat your oven to 400°F and line a baking sheet with parchment paper if you’re baking, or pour enough vegetable oil into a deep frying pan to reach 2 inches up the sides and warm it over medium-high heat.
- Grab three shallow bowls and add 1 cup all-purpose flour to the first one, beat 2 large eggs in the second, and put 2 cups crushed potato chips in the third.
- Mix 1 teaspoon garlic powder, 1 teaspoon onion powder, 1 teaspoon paprika, plus salt and pepper into your flour bowl so the seasoning is evenly distributed.
- Take each of your 1 pound chicken breast strips and coat it completely in the seasoned flour, shaking off any excess.
- Dunk each floured strip into the beaten eggs and let the extra drip back into the bowl.
- Press your egg-coated strips into the crushed potato chips until they’re thoroughly covered on all sides.
- Place your coated strips on the prepared baking sheet if baking, or carefully set them into the hot oil if frying.
- Bake at 400°F for 20 to 25 minutes until golden and cooked through, or fry for 4 to 5 minutes per side until the coating is crispy and the chicken is cooked through.
- If you fried your strips, transfer them to paper towels to soak up the excess oil.
- Serve your finished strips right away while they’re still hot with any dipping sauce your family prefers.
Notes
- Crush your potato chips into uneven pieces rather than fine crumbs, since larger bits create crunchier, more textured coating on your chicken.
- Don’t skip the seasoned flour step even though the potato chips add flavor, because the flour helps everything stick together and gives you a better crust.
- Pat your chicken strips dry with paper towels before breading them, as moisture prevents the coating from adhering properly to the meat.
- Baking at 400°F gives you a healthier option that still turns golden and crispy, though frying will deliver extra crunch if that’s what suits your preference.
- Prep Time: 15 minutes
- Cook Time: 20-25 minutes (baking) or 8-10 minutes (frying)
- Category: Baked Chicken
- Method: Baking
- Cuisine: American
Nutrition
- Serving Size: 4
- Calories: 460 kcal
- Sugar: 1 g
- Sodium: 600 mg
- Fat: 22 g
- Saturated Fat: 3.5 g
- Unsaturated Fat: 17 g
- Trans Fat: 0.2 g
- Carbohydrates: 32 g
- Fiber: 2 g
- Protein: 35 g
- Cholesterol: 130 mg
Kaiden Poole
Co-Founder & Culinary Story Specialist
Expertise
Global Cuisine Inspiration, Cooking Techniques, Cross-Culture Fusion, Food Trends & Recipe Innovation, Flavor Storytelling, Food Writing, Creative Seasonal Menus
Education
- Program: Culinary Arts Certificate (Professional Cook 1 & 2)
- Focus: Fundamental kitchen techniques, food safety, menu planning, and real-world kitchen experience.
Online Gastronomy & Food Culture Courses (Various Platforms)Kaiden Poole brings global influence and culinary storytelling to the team. Based in Vancouver, BC, he earned his Culinary Arts Certificate from Vancouver Island University and expanded his knowledge through studies in gastronomy, nutrition, and sustainability. He focuses on cross-cultural flavors and creative fusion, crafting recipes that make international cuisine accessible to home cooks. For Kaiden, food is about curiosity, creativity, and connection around the table.