
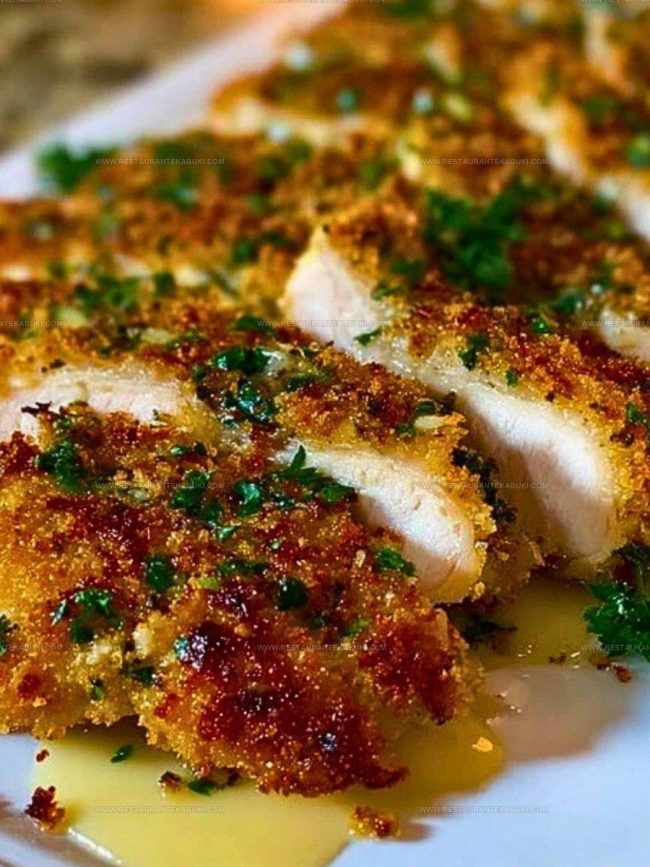
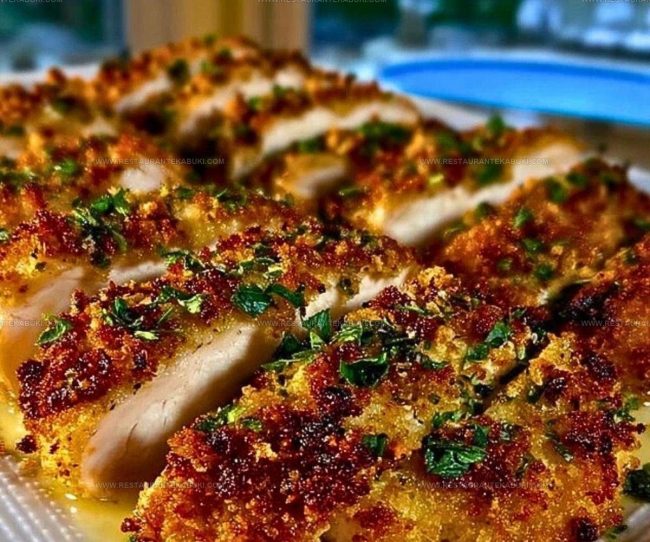
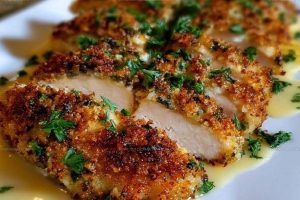
Crispy Garlic Parmesan Crusted Chicken Recipe to Savor
Garlic parmesan crusted chicken is one of those recipes that feels both cozy and impressive at the same time.
Few dishes manage to hit that sweet spot between easy weeknight comfort and something worthy of a special occasion.
Bold, savory flavors meet a satisfyingly crisp exterior that makes every bite feel rewarding.
It works just as well for a casual dinner as it does when you want to put something memorable on the table.
Simple to love and hard to forget, this kind of recipe has a way of earning a permanent spot in your rotation.
When you sit down to eat, the experience speaks entirely for itself – no fancy occasion required.
Why Garlic Parmesan Chicken Belongs on Your Table
Ingredients Behind Garlic Parmesan Crusted Chicken
Main Protein:Breading And Coating:Seasonings And Cooking Fat:Garlic Parmesan Crusted Chicken Tool Collection
Easy Cooking Guide For Garlic Parmesan Chicken
Prepare Your Chicken Breasts
Lay your chicken breasts flat on a cutting board and slice each one horizontally through the middle to create thinner cutlets. This helps them cook more evenly and faster.
Pat each piece dry with paper towels, then sprinkle both sides with salt and pepper, making sure the seasoning reaches every corner of the meat.
Set Up Your Breading Station
Arrange three shallow bowls in front of you in a line.
Fill the first bowl with 1/2 cup all-purpose flour. Pour 2 large eggs, beaten, into the second bowl.
In the third bowl, combine these ingredients for your crust:
Mix everything together in that third bowl until the garlic spreads throughout and nothing clumps together.
Coat Each Chicken Piece
Take one chicken cutlet and dredge it through the flour, coating both sides and shaking off any excess.
Next, dip it into the beaten egg, letting the extra drip back into the bowl. Finally, press the chicken firmly into your breadcrumb mixture, turning it over to get an even, thick coating on both sides.
Set it on a clean plate and repeat with the remaining cutlets.
Heat Your Cooking Oil
Pour 2 tablespoons of olive oil into a large skillet and place it over medium heat.
Let the oil warm for about a minute until it shimmers when you tilt the pan. Your oil is ready when a small piece of breadcrumb sizzles immediately when it hits the surface.
Cook The Chicken
Carefully place your breaded chicken cutlets into the hot oil, working in batches if needed so they don’t crowd the pan. Cook each side for 4 to 5 minutes until the crust turns golden brown and the internal temperature reaches 165 degrees Fahrenheit when measured with a meat thermometer.
The chicken should feel firm when pressed gently with a fork.
Rest Before Serving
Transfer your finished chicken to a clean plate and let it sit for 2 to 3 minutes.
This resting period helps keep the inside juicy while the outside stays crispy. Serve warm while the crust is still at its best.
How To Handle Garlic Parmesan Chicken While Cooking
How Can You Add Variety to Garlic Parmesan Crusted Chicken?
Ideal Sides for Garlic Parmesan Crusted Chicken
How To Store Garlic Parmesan Crusted Chicken For Later
FAQs
How thin should I slice the chicken breasts?
Cut them to about half an inch thick. This thickness cooks evenly and stays juicy inside while getting crispy on the outside. Use a sharp knife and place your hand flat on top of the chicken for control.
Can I prep the chicken ahead of time?
Yes, slice and season your chicken up to 4 hours before cooking. Keep it covered in the fridge. Do the breading right before you cook it so the coating stays crispy.
What if my chicken isn’t golden after 4 minutes?
Every stove runs different, so check the color yourself. If it needs more time, keep cooking until it’s golden brown on that side. Just make sure the inside reaches 165°F.
Do I need to use panko breadcrumbs?
Panko gives you that extra crunch, but regular breadcrumbs work fine too. Panko just creates a crispier crust that holds up better.
What’s the best way to check if the chicken is done?
Use a meat thermometer and check the thickest part. It should read 165°F. If the outside gets too brown before it reaches that temperature, lower your heat a bit.
Garlic Parmesan Crusted Chicken Recipe
- Total Time: 18-20 minutes
- Yield: 4 1x
Description
Garlic parmesan crusted chicken is one of those dishes where a simple chicken breast becomes something special the moment that golden, savory crust hits the pan. Your dinner table gets a restaurant-quality meal that tastes fancy but requires just basic ingredients and about 20 minutes of your time.
Ingredients
Proteins:
- 2 large chicken breasts, sliced in half
- 2 large eggs, beaten
Breading and coating:
- 1 cup panko breadcrumbs
- 3/4 cup freshly grated Parmesan cheese
- 1/2 cup all-purpose flour
- 3 cloves fresh garlic, minced
Seasoning and cooking fat:
- 1 teaspoon salt
- 1/2 teaspoon black pepper
- 2 tablespoons olive oil
Instructions
- Slice your 2 large chicken breasts horizontally to create thinner cutlets, then pat them dry with paper towels and sprinkle 1 teaspoon of salt and 1/2 teaspoon of black pepper over both sides.
- Set up three shallow bowls in a row: fill the first with 1/2 cup of all-purpose flour, the second with your 2 beaten large eggs, and the third with a mixture of 1 cup panko breadcrumbs, 3/4 cup freshly grated Parmesan cheese, and 3 minced cloves of fresh garlic.
- Take each chicken piece and coat it thoroughly in the flour, shake off any excess, then dip it into the beaten egg, and finally press it firmly into your breadcrumb mixture so it adheres evenly on all sides.
- Pour 2 tablespoons of olive oil into your skillet and heat it over medium heat until it shimmers.
- Once your oil is hot, carefully place the breaded chicken into the skillet and cook it for 4 to 5 minutes on the first side until the crust turns golden brown.
- Flip each piece over and cook for another 4 to 5 minutes on the second side, checking that the internal temperature reaches 165°F with a meat thermometer.
- Transfer your finished chicken to a clean plate and let it rest for 2 to 3 minutes before cutting or serving.
Notes
- Pound your chicken breasts to an even thickness so they cook at the same rate and stay tender throughout cooking.
- Keep your breading station organized by setting up bowls from left to right in the order you’ll use them, which prevents mixing up wet and dry ingredients and saves time.
- Don’t skip patting the chicken dry before seasoning, as moisture prevents the coating from sticking properly and browning evenly.
- Cook over medium heat rather than high heat so the breadcrumb coating turns golden without burning while the chicken inside reaches the right temperature.
- Prep Time: 10 minutes
- Cook Time: 8-10 minutes
- Category: More Fried Chicken
- Method: Frying
- Cuisine: American
Nutrition
- Serving Size: 4
- Calories: 437 kcal
- Sugar: 1 g
- Sodium: 669 mg
- Fat: 22 g
- Saturated Fat: 6 g
- Unsaturated Fat: 15 g
- Trans Fat: 0 g
- Carbohydrates: 23 g
- Fiber: 1 g
- Protein: 39 g
- Cholesterol: 144 mg
Kaiden Poole
Co-Founder & Culinary Story Specialist
Expertise
Global Cuisine Inspiration, Cooking Techniques, Cross-Culture Fusion, Food Trends & Recipe Innovation, Flavor Storytelling, Food Writing, Creative Seasonal Menus
Education
- Program: Culinary Arts Certificate (Professional Cook 1 & 2)
- Focus: Fundamental kitchen techniques, food safety, menu planning, and real-world kitchen experience.
Online Gastronomy & Food Culture Courses (Various Platforms)Kaiden Poole brings global influence and culinary storytelling to the team. Based in Vancouver, BC, he earned his Culinary Arts Certificate from Vancouver Island University and expanded his knowledge through studies in gastronomy, nutrition, and sustainability. He focuses on cross-cultural flavors and creative fusion, crafting recipes that make international cuisine accessible to home cooks. For Kaiden, food is about curiosity, creativity, and connection around the table.