Fried Chicken Recipe For Golden Crunchy Perfection
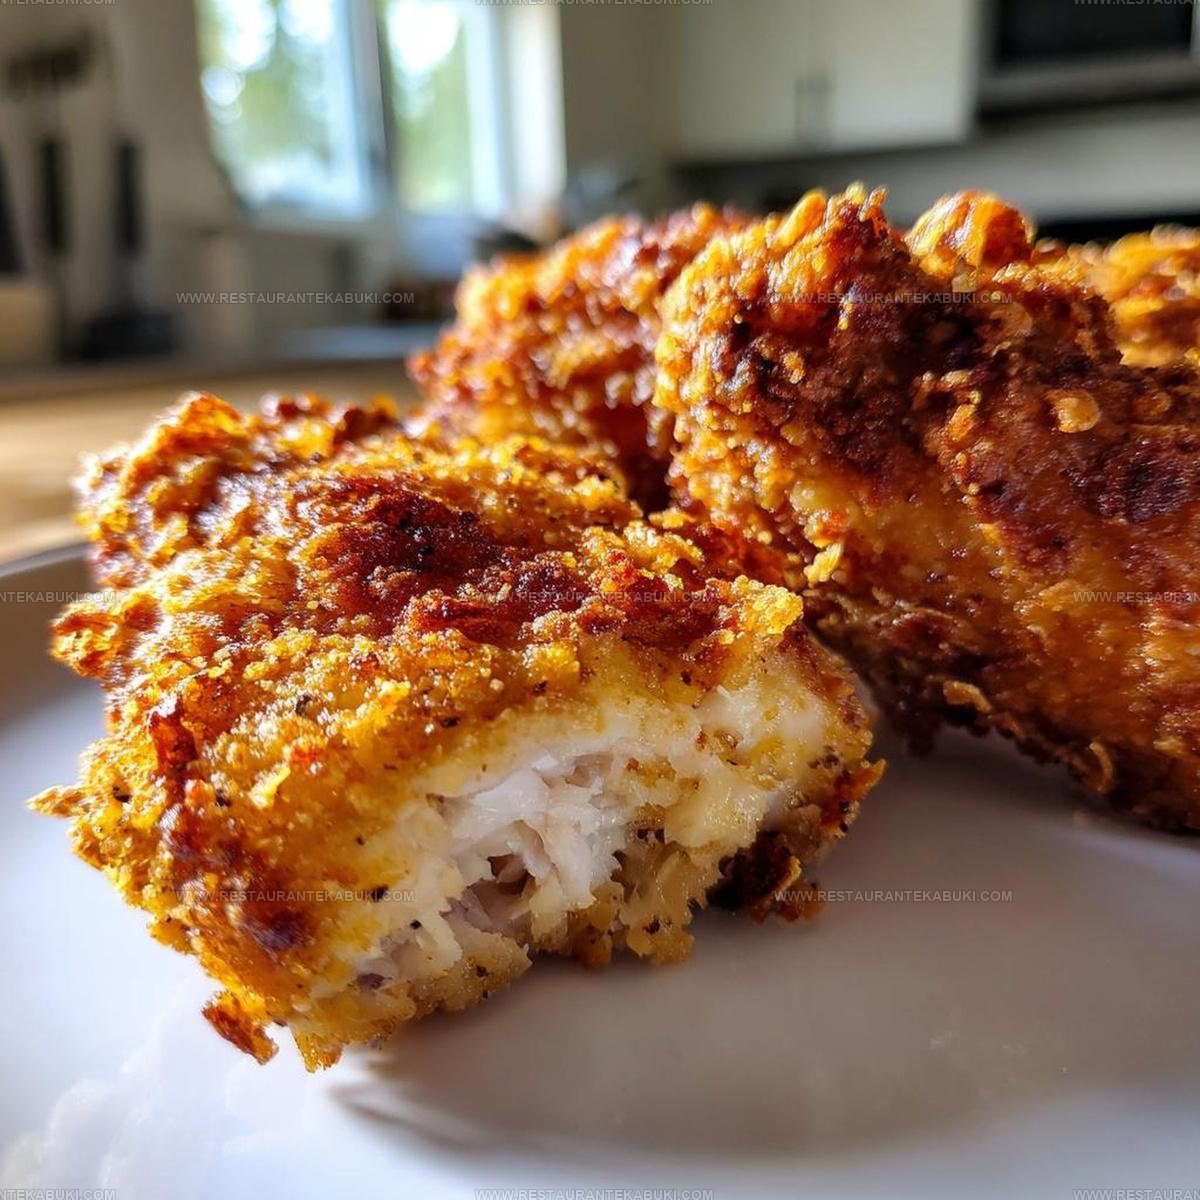
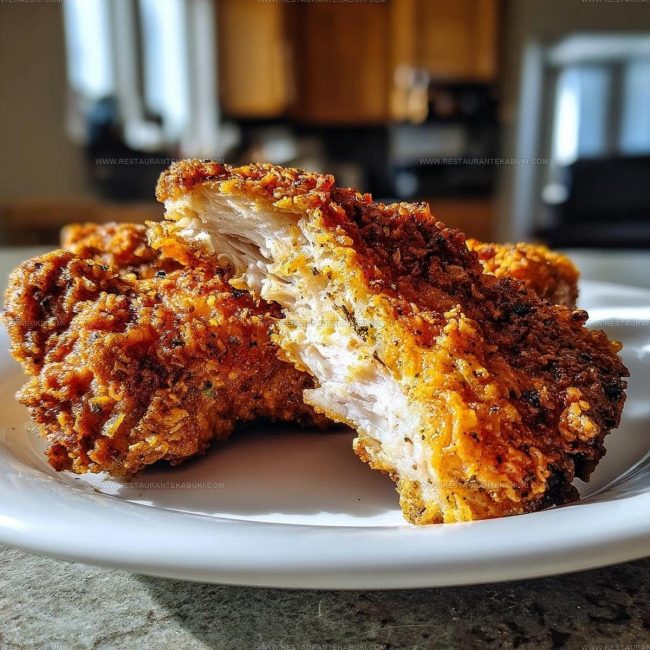
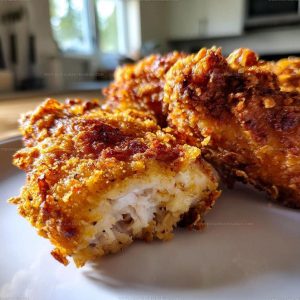
Golden, crunchy perfection meets juicy tenderness in this crispy fried chicken recipe that has won hearts across dinner tables for generations.
Few comfort foods match the universal satisfaction of biting into perfectly seasoned poultry with a shatteringly crunchy exterior.
The aroma alone has a way of drawing people into the kitchen long before mealtime arrives.
Best of all, you don't need fancy equipment or hard-to-find seasonings to achieve that coveted crackly coating everyone craves.
Sunday suppers become special occasions, and weeknight dinners feel like celebrations when this classic shows up on the table.
Scroll down to see exactly how simple creating fried chicken magic at home can be.
Top Reasons to Love Crispy Fried Chicken
Crispy Fried Chicken Ingredient Collection
The Chicken:The Coating:The Frying:Fried Chicken Tool List
Full Steps For Crispy Fried Chicken
Prepare Your Seasoned Flour Mixture
In a large bowl, combine the dry ingredients for coating your chicken pieces. You need to mix together:
Stir everything together until the spices are evenly distributed throughout the flour, making sure there are no clumps.
Make Your Egg Wash
Grab another bowl and crack 2 eggs into it, then pour in 1 cup of buttermilk. Whisk these together vigorously until the mixture is smooth and well combined. This creates the binding layer that helps your coating stick to the chicken.
Coat Each Chicken Piece
Take your chicken pieces and dip each one into the buttermilk mixture, coating all sides thoroughly. Then transfer each piece to your seasoned flour bowl and roll it around, pressing gently so the coating adheres well to your chicken. Make sure every surface gets covered with the flour mixture before setting the coated pieces aside on a clean plate.
Heat Your Oil to the Right Temperature
Pour vegetable oil into a deep pan until it reaches about 2-3 inches deep. Place the pan on the stove over medium-high heat and use a thermometer to monitor the temperature. Once your oil reaches 350°F (175°C), it’s ready for frying.
Fry Your Chicken Pieces
Carefully place your coated chicken pieces into the hot oil, working in batches so your pan doesn’t get crowded. Let them cook for 10 to 12 minutes total, turning them halfway through to ensure even browning. Your chicken is done when the coating turns golden brown and the internal temperature reaches 165°F (74°C) when measured with a meat thermometer.
Rest Your Fried Chicken
Remove the cooked chicken pieces from the oil using tongs or a slotted spoon and place them on a paper towel-lined plate. This allows the excess oil to drain away while your chicken stays warm and the coating stays crispy.
Crispy Fried Chicken Tips For Better Results
Creative Alternatives for Crispy Fried Chicken
Smart Ways to Serve Fried Chicken
Top Storage Tips For Crispy Fried Chicken
FAQs
Why does my chicken come out soggy instead of crispy?
Make sure your oil reaches 350°F before adding chicken. If the temperature is too low, the chicken absorbs oil and loses that crunch. Use a thermometer to check, and let each piece fry without crowding the pan.
Can I skip the buttermilk?
Buttermilk helps the coating stick better and keeps the meat tender inside. Regular milk works if that’s what you have at home, though buttermilk gives the best results for your batch.
What if I don’t have all the spices listed?
Use what sits in your spice cabinet. The key is salt and pepper for seasoning. Paprika and garlic powder add flavor, but your fried chicken tastes great with just the basics.
How do I know when the chicken is fully cooked?
Fry for the full 10-12 minutes until the coating turns golden brown. For thick pieces, cut into the thickest part, there should be no pink inside.
Can I reuse the oil after frying?
Strain the oil through a fine mesh to remove crumbs, then store it in a clean container. Reuse it 2-3 times before replacing for best flavor and safety.
Crispy Fried Chicken Recipe
- Total Time: 22 minutes
- Yield: 4 1x
Description
Crispy fried chicken is one of those dishes where you nail that perfect golden crust while keeping the meat juicy inside, and the trick comes down to how you season your flour and manage your oil temperature. Getting that satisfying crunch that stays crispy even after it cools takes a bit of attention, but once you master the technique, you can make restaurant-quality chicken at home whenever you crave it.
Ingredients
Protein:
- 1 whole chicken, cut into pieces
- 2 eggs
- 1 cup buttermilk
Dry Ingredients:
- 2 cups all-purpose flour
- 1 teaspoon salt
- 1 teaspoon black pepper
- 1 teaspoon paprika
- 1 teaspoon garlic powder
- 1 teaspoon onion powder
Cooking Fat:
- Vegetable oil for frying
Instructions
- Combine 2 cups of all-purpose flour with 1 tsp salt, 1 tsp black pepper, 1 tsp paprika, 1 tsp garlic powder, and 1 tsp onion powder in a shallow bowl, mixing everything together thoroughly.
- Whisk 2 eggs together with 1 cup buttermilk in another bowl until the mixture is smooth and well blended.
- Take your chicken pieces and dip each one into the buttermilk mixture, making sure your pieces are fully coated.
- Transfer the buttermilk-coated chicken directly into your flour mixture, pressing gently so the coating adheres to all surfaces of your pieces.
- Pour vegetable oil into a deep pan or Dutch oven and heat it to 350°F, which takes about 5 to 8 minutes depending on your pan size.
- Once your oil reaches temperature, carefully place your coated chicken pieces into the hot oil in batches, avoiding overcrowding so your pieces cook evenly.
- Fry your chicken for 10 to 12 minutes at 350°F, turning the pieces halfway through cooking to ensure both sides become golden brown and the internal temperature reaches 165°F.
- Remove your finished chicken from the oil using tongs or a slotted spoon and transfer it immediately onto paper towels to absorb any excess oil.
- Let your chicken rest on the paper towels for 2 to 3 minutes before serving it to your table.
Notes
- Double-dredging your chicken, coating it once, letting it sit for a few minutes, then dipping and coating again, gives you that extra-thick, satisfying crust that stays crispy even after it cools down.
- Keep your oil temperature steady at 350°F because if it drops too low, your chicken absorbs grease instead of frying, and if it gets too hot, the outside burns before the inside cooks through.
- Don’t skip the buttermilk soak since the acidity tenderizes the chicken from the inside while helping the flour coating stick better to each piece.
- For a gluten-free version, swap regular flour for cornstarch mixed with rice flour in the same proportions, and your chicken will come out just as golden and crunchy.
- Prep Time: 10 minutes
- Cook Time: 12 minutes
- Category: More Fried Chicken
- Method: Frying
- Cuisine: American
Nutrition
- Serving Size: 4
- Calories: 550 kcal
- Sugar: 1 g
- Sodium: 700 mg
- Fat: 35 g
- Saturated Fat: 7 g
- Unsaturated Fat: 20 g
- Trans Fat: 0.5 g
- Carbohydrates: 30 g
- Fiber: 2 g
- Protein: 40 g
- Cholesterol: 150 mg
Kaiden Poole
Co-Founder & Culinary Story Specialist
Expertise
Global Cuisine Inspiration, Cooking Techniques, Cross-Culture Fusion, Food Trends & Recipe Innovation, Flavor Storytelling, Food Writing, Creative Seasonal Menus
Education
- Program: Culinary Arts Certificate (Professional Cook 1 & 2)
- Focus: Fundamental kitchen techniques, food safety, menu planning, and real-world kitchen experience.
Online Gastronomy & Food Culture Courses (Various Platforms)Kaiden Poole brings global influence and culinary storytelling to the team. Based in Vancouver, BC, he earned his Culinary Arts Certificate from Vancouver Island University and expanded his knowledge through studies in gastronomy, nutrition, and sustainability. He focuses on cross-cultural flavors and creative fusion, crafting recipes that make international cuisine accessible to home cooks. For Kaiden, food is about curiosity, creativity, and connection around the table.