Coconut Chicken Curry Recipe That Melts In Your Mouth
Coconut chicken curry recipe enthusiasts know that few dishes offer such comforting warmth paired with layers of rich, aromatic flavor.
Something about creamy, savory meals with subtle sweetness makes weeknight dinners feel special without requiring hours in the kitchen.
Perfect for cozy evenings when you crave something satisfying yet not too heavy, it works beautifully for casual gatherings or quiet nights at home.
The balance of mild heat and smooth richness appeals to adults and little ones alike, making it a go-to option when feeding different palates.
Best of all, most kitchens already have what you need to pull off something truly impressive.
Preparation stays straightforward enough for busy schedules while delivering results that feel luxurious.
Time to roll up your sleeves and bring restaurant-worthy flavor right to the dinner table tonight.
A Closer Look At Coconut Chicken Curry
Coconut Chicken Curry Recipe Ingredients
Base Ingredients:Protein And Cooking Liquid:Finishing Ingredients:Coconut Chicken Curry Tools for Quick Setup
Cooking Process For Coconut Chicken Curry
Heat Your Base
Set your Instant Pot to sauté mode and let 1 tbsp ghee or oil warm up in the pot. If you have cumin seeds on hand, toss in 1 tsp and let them toast for about 30 seconds until they become fragrant.
Cook Your Aromatics
Now add your diced onions, ginger, and garlic to the pot. Here’s what goes in:
Let these cook together for about 3 minutes, stirring occasionally, until your onions turn golden and soften.
Build Flavor With Tomato And Spices
Stir in your tomato puree along with the garam masala. The ingredients for this step are:
Let this mixture cook for 2 to 3 minutes so the spices can release their flavors into the base.
Add And Coat Your Chicken
Add 1 lb of boneless skinless chicken thighs that you’ve cut into 1 to 1.5 inch pieces to the pot. Stir everything together and let the chicken cook in the spice mixture for 3 to 4 minutes so it gets fully coated.
Deglaze The Pot
Pour in 1/4 cup water and scrape the bottom of the pot with a wooden spoon to lift up any browned bits stuck there. This adds extra flavor to your curry. Turn off the sauté mode.
Pressure Cook The Chicken
Close the lid securely and set your Instant Pot to high pressure for 4 minutes. Once the timer goes off, do a quick release by carefully turning the valve to release all the steam.
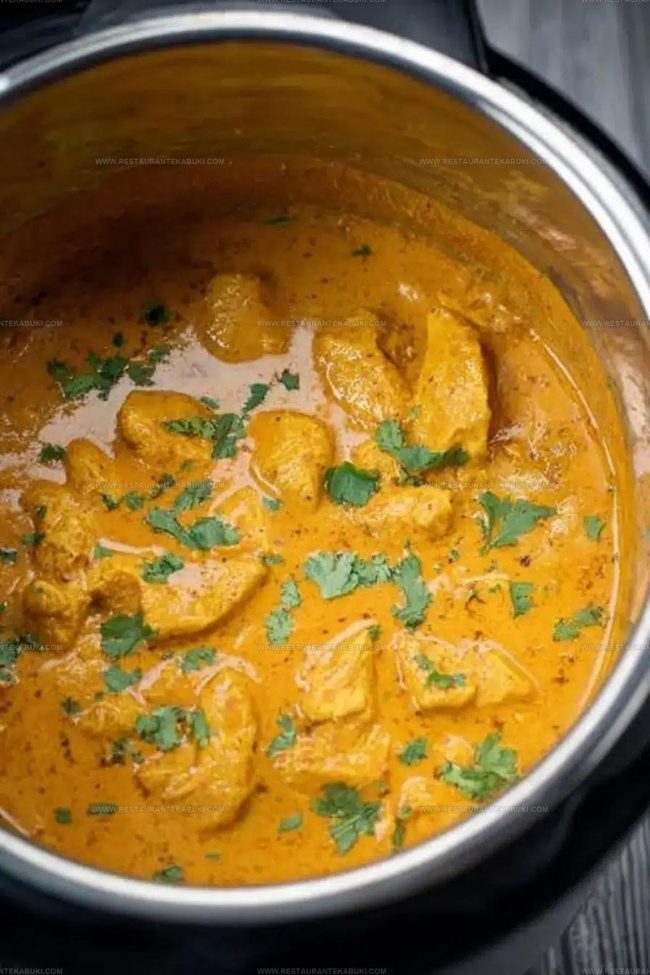
Finish With Coconut And Spice
Open the lid and stir in your coconut milk and garam masala:
Switch back to sauté mode and let everything simmer together for 4 to 5 minutes so the flavors blend and the sauce thickens slightly.
Brighten And Serve
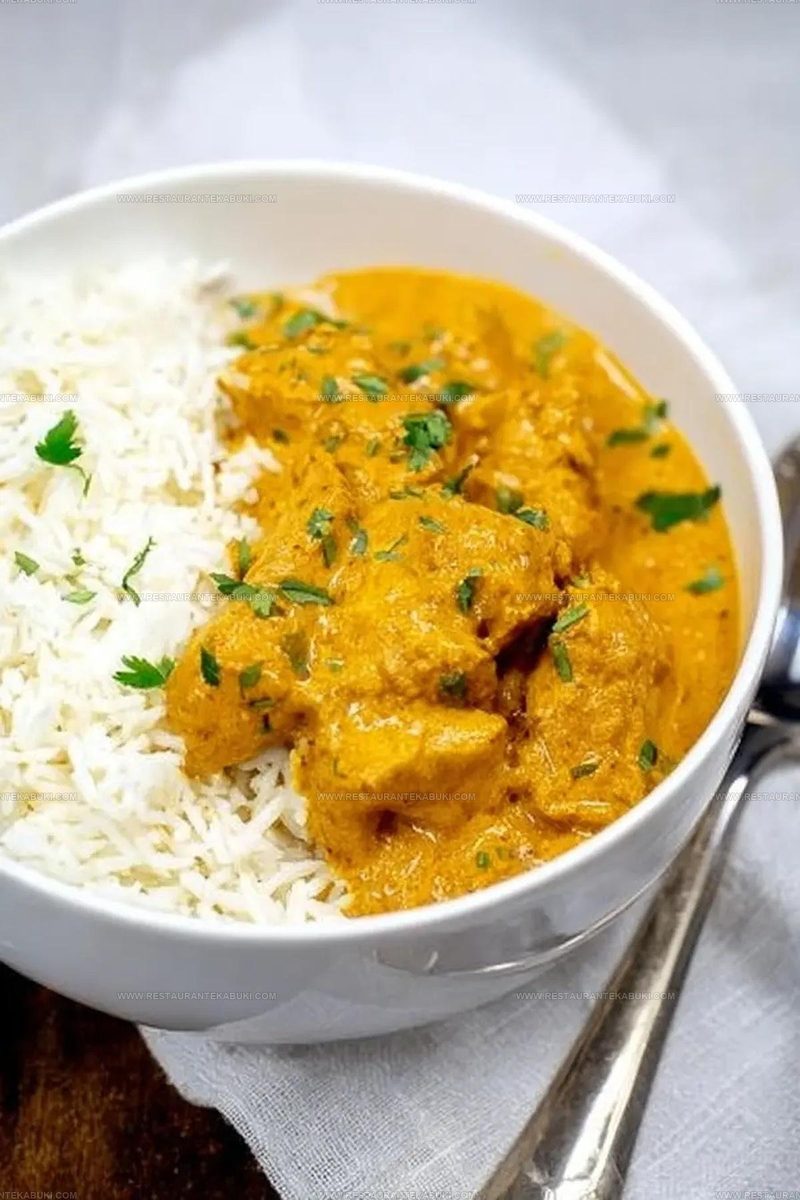
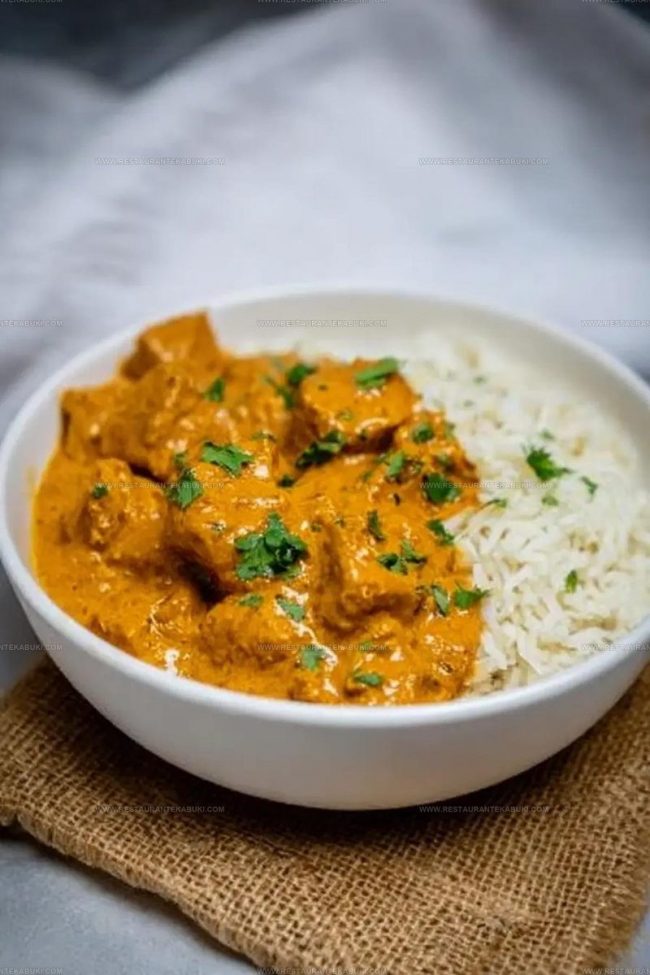
Squeeze in 1 tbsp of lime juice and stir to distribute it throughout the curry. This adds brightness and balances all those warm spices. Serve your curry hot over rice or alongside naan bread.
How Can You Refine Coconut Chicken Curry
Creative Alternatives for Coconut Chicken Curry
Ways to Plate Coconut Chicken Curry Nicely
Clever Storage Tips For Coconut Chicken Curry
FAQs
Can I use chicken with bones instead of boneless pieces?
Yes, bone-in chicken works great. It adds more flavor to the curry. Just check that the meat is cooked through before serving.
What if I don’t have tomato puree?
You can use canned crushed tomatoes or tomato sauce. Use about the same amount, or adjust based on how thick you want the curry.
Is there a substitute for coconut milk?
Regular heavy cream or Greek yogurt mixed with a little water gives a creamy texture. The flavor will be different but still tasty.
Why do I need to deglaze the pot?
Deglazing lifts the flavorful brown bits stuck to the bottom. This adds depth to your curry and prevents the pot from burning.
Can I make this without an Instant Pot?
Yes, use a regular pot. Sauté the same way, then simmer covered on low heat for about 20-25 minutes until chicken is fully cooked.
How much water should I add?
Start with one cup. If your curry is too thick after cooking, add more water a little at a time until it reaches the consistency you like.

Coconut Chicken Curry Recipe
- Total Time: 21-23 minutes
- Yield: 4 1x
Description
Instant pot coconut chicken curry brings tender chicken and aromatic spices together in a creamy sauce that comes together in minutes rather than hours. Your weeknight dinner just became easier, with layers of coconut and curry flavor that make each bite satisfying without keeping you in the kitchen all evening.
Ingredients
Base and aromatics:
- 1 tablespoon ghee or oil
- 1 teaspoon cumin seeds
- 1 cup yellow onion, diced
- 0.5 tablespoon ginger paste or grated
- 0.5 tablespoon garlic paste or minced
Protein and liquids:
- 1 pound boneless skinless chicken thighs, cut into 1–1.5 inch pieces
- 1 cup tomato puree
- 0.25 cup water
- 1 cup full-fat canned unsweetened coconut milk
Seasonings and finishing:
- 1 teaspoon garam masala
- 1 tablespoon lime juice
Instructions
- Switch your Instant Pot to sauté mode and warm 1 tablespoon of ghee or oil for about 30 seconds, then add 1 teaspoon of cumin seeds if you have them on hand.
- Toss in 1 cup of diced yellow onion along with 1/2 tablespoon of ginger and 1/2 tablespoon of garlic, letting everything soften and turn golden for roughly 3 minutes.
- Mix in 1 cup of tomato puree and 1 teaspoon of garam masala, cooking this base for 2 to 3 minutes so the flavors develop.
- Add your 1 pound of chicken thighs cut into 1 to 1.5 inch pieces and let them cook in the spiced mixture for 3 to 4 minutes.
- Pour 1/4 cup of water into the pot and scrape up any browned bits stuck to the bottom, then turn off the sauté function.
- Seal the lid and pressure cook on high at 15 psi for exactly 4 minutes.
- Release the pressure quickly once the timer goes off, then open your pot carefully.
- Stir in 1 cup of full-fat unsweetened coconut milk and switch back to sauté mode for 4 to 5 minutes.
- Add 1 tablespoon of lime juice at the end, giving everything a final stir before serving your curry over rice or with naan.
Notes
- Make sure to scrape up all the browned bits from the bottom of the pot when deglazing, as this adds deep flavor to your curry sauce.
- If your chicken pieces are thick, cut them into smaller chunks so they cook evenly in the short 4-minute pressure cooking time.
- For a dairy-free version, use full-fat coconut milk from the start instead of adding it at the end, and skip the garam masala if it contains dairy.
- Add the lime juice right before serving since it brightens the dish best when fresh, and taste the curry before adjusting the spices to suit your preference.
- Prep Time: 8 minutes
- Cook Time: 13-15 minutes
- Category: Slow Cooked Chicken
- Method: Pressure Cooking
- Cuisine: Indian
Nutrition
- Serving Size: 4
- Calories: 389 kcal
- Sugar: 3 g
- Sodium: 85 mg
- Fat: 26 g
- Saturated Fat: 18 g
- Unsaturated Fat: 8 g
- Trans Fat: 0 g
- Carbohydrates: 8 g
- Fiber: 2 g
- Protein: 33 g
- Cholesterol: 105 mg
Kaiden Poole
Co-Founder & Culinary Story Specialist
Expertise
Global Cuisine Inspiration, Cooking Techniques, Cross-Culture Fusion, Food Trends & Recipe Innovation, Flavor Storytelling, Food Writing, Creative Seasonal Menus
Education
- Program: Culinary Arts Certificate (Professional Cook 1 & 2)
- Focus: Fundamental kitchen techniques, food safety, menu planning, and real-world kitchen experience.
Online Gastronomy & Food Culture Courses (Various Platforms)Kaiden Poole brings global influence and culinary storytelling to the team. Based in Vancouver, BC, he earned his Culinary Arts Certificate from Vancouver Island University and expanded his knowledge through studies in gastronomy, nutrition, and sustainability. He focuses on cross-cultural flavors and creative fusion, crafting recipes that make international cuisine accessible to home cooks. For Kaiden, food is about curiosity, creativity, and connection around the table.