
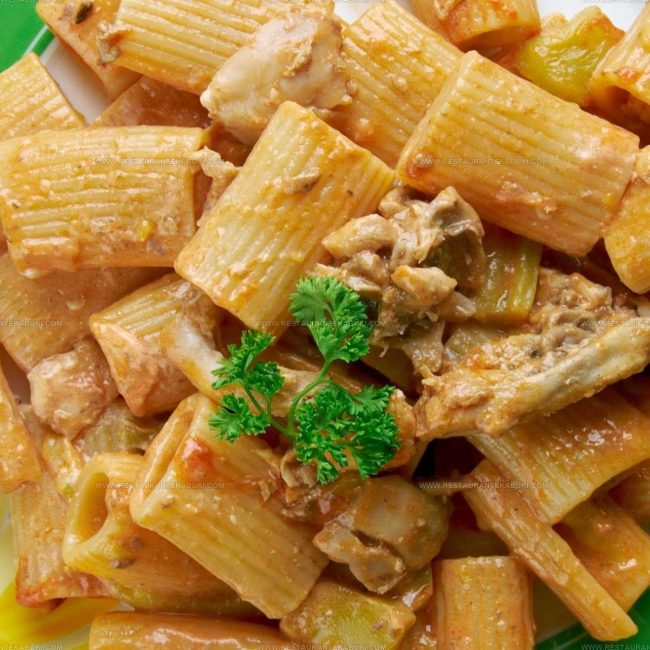
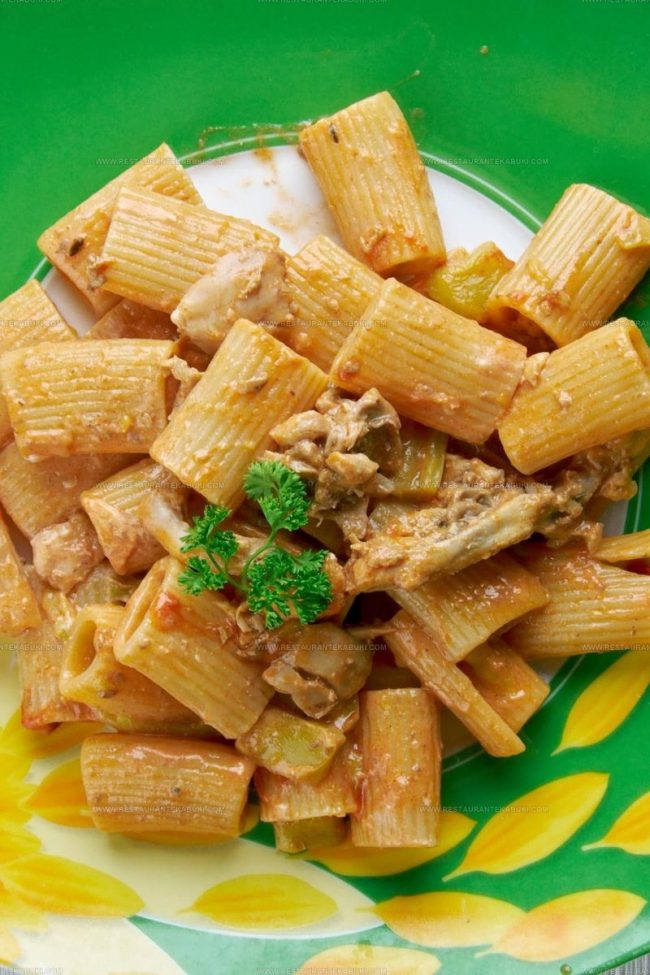
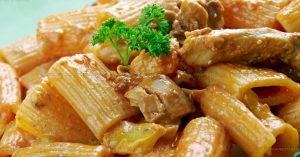
Spicy Chicken Riggies Recipe That Warms Your Soul
Chicken riggies is one of those hearty, satisfying dinner recipes that has earned a loyal following far beyond its Central New York roots.
Bold, comforting, and deeply flavorful, it hits that sweet spot between casual weeknight food and something worth getting excited about.
Pasta lovers and meat enthusiasts alike tend to gravitate toward dishes with this kind of rich, soul-warming character.
It pairs rustic Italian-American tradition with a personality that feels both familiar and excitingly distinct.
Cozy evenings and relaxed dinner tables are where a recipe like this truly shines.
With every bite, you get that satisfying sense of a meal that was worth every minute spent in the kitchen.
Head to the full recipe and see why so many home cooks keep coming back to this classic again and again.
Why This Chicken Riggies Works So Well
Which Ingredients Should Come First for Chicken Riggies
Main Proteins And Vegetables:Seasonings And Sauce Components:Pasta And Thickener:Which Tools Work Best for Chicken Riggies
How To Make Chicken Riggies
Melt The Butter
Get a large pot and place it on medium-high heat. Add 4 tablespoons of butter and let it melt completely until it’s bubbly and hot.
This takes just a minute or two, and the butter is ready when it starts to smell fragrant.
Cook The Chicken
Once your butter is ready, add 2 1/2 lbs of chicken breasts that you’ve cut into 3/4 to 1-inch pieces.
Cook them for about 5 minutes, stirring occasionally, until the outside starts turning white. The chicken doesn’t need to be fully cooked at this stage, just getting started.
Add The Mushrooms
Stir 8 ounces of sliced baby Bella mushrooms into the pot with your chicken. Let everything cook together for 5 more minutes so the mushrooms start to soften and release their moisture.
Build Flavor With Vegetables
Now’s the time to add your vegetables. Combine the following to your pot:
Sprinkle salt and black pepper to your taste across everything.
Keep cooking for 5 to 7 minutes while stirring, letting these vegetables get soft and fragrant.
Create The Sauce Base
This is where your dish comes together.
Pour into the pot:
Stir everything together until it’s well combined and no streaks of cream remain.
Simmer The Mixture
Turn your heat up just enough to bring everything to a boil, which takes a few minutes.
Once bubbles are rolling across the surface, cover the pot and turn your heat down to low. Let it simmer gently for 20 minutes, giving it a stir every few minutes so nothing sticks to the bottom.
Cook Your Pasta
While your chicken mixture is simmering, fill another pot with salted water and bring it to a boil. Add 1 lb of rigatoni and cook it according to the package directions, which is typically around 9 to 11 minutes.
Drain it well when it’s done and set it aside.
Add The Olives
After your 20 minutes of simmering are up, stir 1/2 cup of black olives into the pot.
Let everything continue to simmer without the lid for another 5 minutes. At this point, your sauce should be quite saucy and flavorful.
Make A Thickening Paste
In a small bowl, combine:
Stir them together until the mixture is thick but still pourable, not lumpy. It should look like a thin paste rather than a runny liquid.
Thicken The Sauce
Pour your cornstarch mixture slowly into the pot while stirring constantly. Keep stirring for a minute or two until no white streaks remain and the sauce becomes noticeably thicker.
The heat from the pot cooks the cornstarch and makes everything come together beautifully.
Combine And Serve
Add your cooked and drained rigatoni directly into the pot and stir everything together until the pasta is coated with the creamy, rich sauce.
Serve it warm, right into bowls for your table.
Small Adjustments For Tastier Chicken Riggies
Flavor Combos That Fit Chicken Riggies
Thoughtful Serving Ideas For Chicken Riggies
Where And How To Store Chicken Riggies
FAQs
What’s a chicken riggy?
It’s a creamy pasta dish with chunks of chicken, peppers, mushrooms, and olives in a rich tomato sauce. This comfort food comes from Utica, New York, and brings together tender chicken with a savory, slightly spicy sauce that coats every bite of pasta.
Can I use chicken breasts instead of thighs?
Yes, chicken breasts work fine, though thighs stay juicier during cooking. If your breasts are thick, cut them into smaller pieces so they cook evenly with the other ingredients.
What if I don’t have hot peppers?
Leave them out or swap in crushed red pepper flakes to taste. The dish won’t be as spicy, but the flavors stay delicious either way.
Why do I need the cornstarch slurry?
It thickens the sauce so it clings to your pasta instead of pooling at the bottom of the bowl. Your final dish becomes creamy and cohesive rather than soupy.
Can I skip the olives?
Sure, though they add a briny kick that balances the cream and tomato nicely. If you’re not an olive person, the riggy still tastes great without them.
Chicken Riggies Dinner Recipe
- Total Time: 42-44 minutes
- Yield: 6 1x
Description
Chicken riggies blends tender chicken and rigatoni pasta in a savory tomato sauce that’s been a comfort food staple in Utica, New York for generations. When you combine the peppers, onions, and that signature red sauce with crispy fried chicken pieces, you get a hearty dish that satisfies exactly what you’re craving for dinner.
Ingredients
Protein and Produce:
- 2.5 lbs chicken breasts, cut into 3/4 to 1-inch pieces
- 8 ounces Baby Bella mushrooms, sliced
- 1 green bell pepper, chopped
- 1 onion, chopped
- 1–2 hot peppers, jarred
- 0.5 cup black olives
Cooking Fats and Base:
- 4 tablespoons butter
- 2 cups water
- 2 tablespoons chicken bouillon
Sauce and Seasonings:
- 1 cup tomato sauce
- 1 cup heavy cream
- 1 teaspoon paprika
- 1 teaspoon parsley
- 2 tablespoons cornstarch
- 2–3 tablespoons cold water
- Salt, to taste
- Black pepper, to taste
- Crushed red pepper flakes, to taste
- 1 lb rigatoni, cooked and drained
Instructions
- Melt 4 tablespoons of butter in your large pot over medium-high heat until it begins to bubble.
- Add your 2 1/2 lbs of chicken breast pieces (cut into 3/4 to 1-inch chunks) to the melted butter and cook for about 3 minutes at medium-high heat until the chicken starts turning white on the edges.
- Stir in your 8 ounces of sliced Baby Bella mushrooms and let them cook alongside the chicken for 5 minutes at medium-high heat.
- Add your chopped green bell pepper, 1-2 jarred hot peppers, and chopped onion to the pot, then season everything with salt and black pepper to your liking and cook for 5-7 minutes at medium-high heat.
- Pour in 2 cups of water, dissolve 2 tablespoons of chicken bouillon into the liquid, then add 1 cup of tomato sauce, 1 cup of heavy cream, 1 teaspoon of paprika, 1 teaspoon of parsley, and crushed red pepper flakes if you prefer extra heat.
- Bring your mixture to a boil over medium-high heat, then cover the pot, reduce to medium-low heat, and simmer gently for 20 minutes while stirring occasionally.
- Cook your 1 lb of rigatoni according to the package directions during this 20-minute simmer time, then drain it completely.
- Stir your 1/2 cup of black olives into the simmering sauce and let everything cook uncovered for 5 minutes at medium-low heat.
- Mix 2 tablespoons of cornstarch with 2-3 tablespoons of cold water in a small bowl until you reach a thick but pourable consistency.
- Pour your cornstarch mixture into the sauce at medium-low heat and stir constantly until all white streaks disappear and the sauce thickens, which takes about 2-3 minutes.
- Fold your drained pasta into the thickened sauce and serve warm to your table.
Notes
- Don’t skip searing the chicken in butter first, as this step builds flavor for your entire dish before the sauce comes together.
- Keep your heat at a gentle simmer once the pot is covered, since high heat can make the cream curdle and affect your sauce’s smoothness.
- Mix that cornstarch slurry to the right consistency; too thick and it won’t blend in, too thin and your sauce stays runny; so test it with a spoon before adding it to the pot.
- If your kitchen runs warm or the sauce breaks during cooking, a splash of fresh heavy cream stirred in gently can help restore the creamy texture.
- Prep Time: 12-14 minutes
- Cook Time: 30 minutes
- Category: Simmered Chicken
- Method: Simmering
- Cuisine: Italian-American
Nutrition
- Serving Size: 6
- Calories: 541 kcal
- Sugar: 5 g
- Sodium: 690 mg
- Fat: 25 g
- Saturated Fat: 13 g
- Unsaturated Fat: 11 g
- Trans Fat: 0.3 g
- Carbohydrates: 38 g
- Fiber: 4 g
- Protein: 46 g
- Cholesterol: 125 mg
Kaiden Poole
Co-Founder & Culinary Story Specialist
Expertise
Global Cuisine Inspiration, Cooking Techniques, Cross-Culture Fusion, Food Trends & Recipe Innovation, Flavor Storytelling, Food Writing, Creative Seasonal Menus
Education
- Program: Culinary Arts Certificate (Professional Cook 1 & 2)
- Focus: Fundamental kitchen techniques, food safety, menu planning, and real-world kitchen experience.
Online Gastronomy & Food Culture Courses (Various Platforms)Kaiden Poole brings global influence and culinary storytelling to the team. Based in Vancouver, BC, he earned his Culinary Arts Certificate from Vancouver Island University and expanded his knowledge through studies in gastronomy, nutrition, and sustainability. He focuses on cross-cultural flavors and creative fusion, crafting recipes that make international cuisine accessible to home cooks. For Kaiden, food is about curiosity, creativity, and connection around the table.