
Smoky Beer Can Chicken Recipe for Backyard Grilling
Juicy, flavorful poultry hot off the grill makes any backyard gathering feel special, and beer can chicken recipe delivers exactly that kind of crowd-pleasing magic.
This cooking method keeps the meat incredibly moist while developing a beautifully crispy skin that everyone loves.
It's become a favorite for good news reasons: minimal prep, maximum flavor, and impressive presentation that looks far more complicated than it actually is.
Weekends and warm weather call for meals that feel relaxed yet memorable, and few options satisfy quite like this one.
Grilling enthusiasts appreciate how foolproof the technique proves time after time.
Gathering around the table with loved ones becomes even more enjoyable when the main course turns out perfectly tender every single time.
What Makes Beer Can Chicken Worth a Spot

Beer Can Chicken Ingredient List to Start With
Main Chicken And Brine:Seasoning And Beer:Vegetables And Oil:Gather These Tools for Beer Can Chicken
Full Cooking Guide For Beer Can Chicken
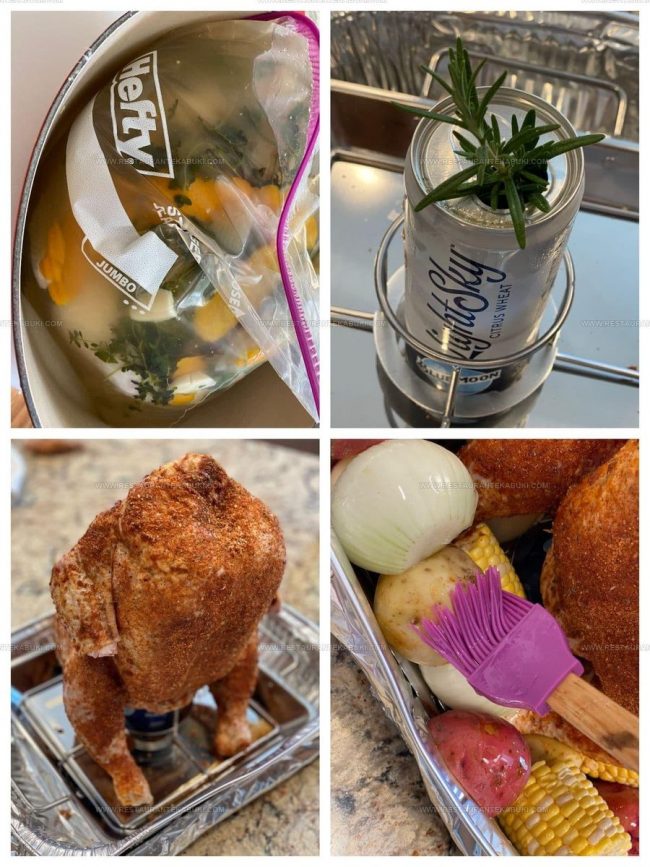
Prepare The Brine
Make a half batch of turkey brine using whatever recipe you prefer, then let it cool completely in the refrigerator before moving forward.
Brine The Chicken
Rinse your chicken under cold water and pull out the giblets and neck from inside.
Place the chicken in a large food-grade zip-top bag and sit the bag in a pot to keep it stable while you pour the cooled brine over it. Seal the bag while squeezing out as much air as possible, then refrigerate for 12 to 24 hours.
Make Your Spice Rub
Mix together your chosen spice rub ingredients in a bowl and set aside.
Set Up Your Cooking Space
Place a beer can chicken rack into a disposable aluminum pan, then set that pan on a foil-lined sheet tray.
Preheat Your Grill Or Oven
Heat your grill or oven to 350 degrees Fahrenheit about 3 hours before dinner time.
Prepare The Chicken For Seasoning
Drain the brine and discard it completely, then rinse your chicken under cold water.
Pat it dry with paper towels until there’s no moisture left on the skin, then brush 2 tablespoons of vegetable oil all over the outside.
Prepare The Beer Can
Pour about 1/4 cup of beer from the can and discard it.
Insert a large rosemary sprig into the opening of the can, then remove and discard the pull tab. Position the can in the center of your rack.
Season And Position The Chicken
Hold your chicken upright over a cutting board and coat it generously with the spice rub mixture, making sure to get it inside the cavity and all over the outside. Slide the chicken down over the beer can so the legs point downward, then trim off the wing tips with kitchen shears and discard them.
Check that the chicken sits firmly without tipping.
Prepare The Vegetables
Toss together the vegetables for roasting:
Arrange them around the bottom of the pan and around the chicken, using a few potato pieces to stabilize the chicken if needed.
Roast The Chicken And Vegetables
Place the pan in your preheated 350 degree Fahrenheit grill or oven with the lid closed. Cook for 1 hour 30 minutes to 2 hours 30 minutes depending on your chicken’s size, until the thickest part of the thigh reaches an internal temperature of 160 degrees Fahrenheit.
Rest The Chicken
Remove the pan from the heat and let the chicken rest for 15 minutes covered loosely with foil. Return the vegetables to the pan during this resting time so they can brown and crisp up further.
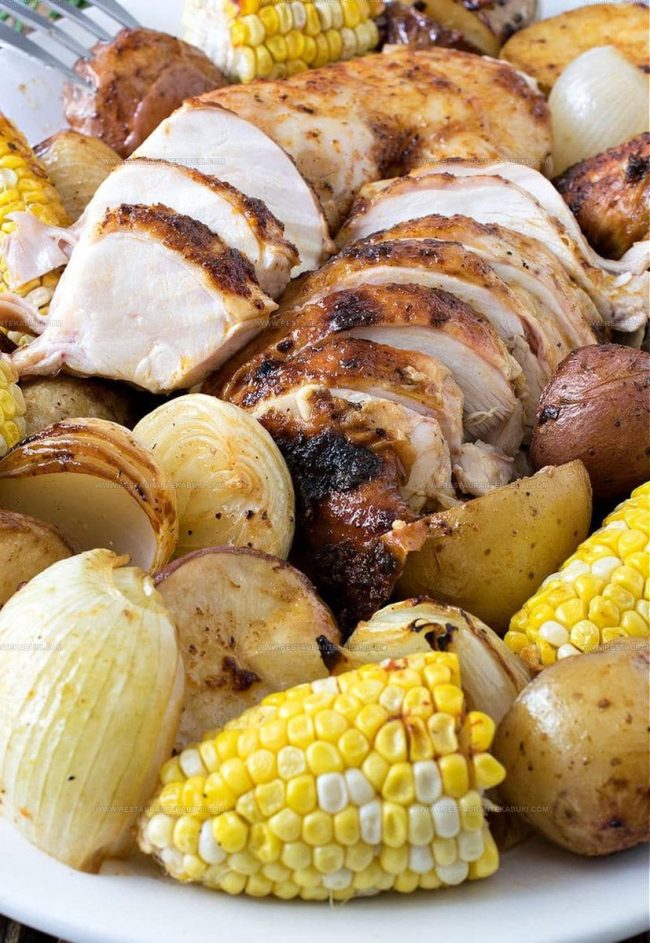
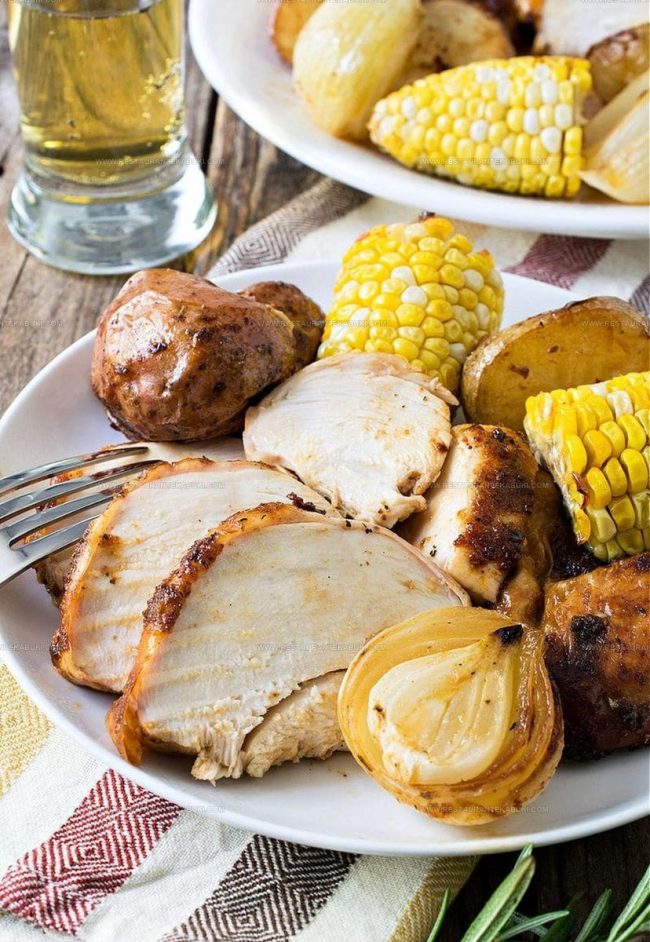
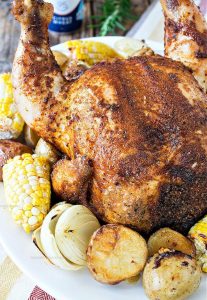
Serve Your Meal
Carve and slice your chicken the way you would any roasted bird. Plate the chicken alongside the hot vegetables and drizzle the pan drippings collected at the bottom over each portion before serving.
What Helps When Grilling Beer Can Chicken
Creative Alternatives for Beer Can Chicken
What To Serve Alongside Beer Can Chicken
Top Storage Advice For Beer Can Chicken
FAQs
Can I use a regular can of beer or does it have to be a specific type?
Any regular beer works fine. Pick whatever you have on hand – lager, pilsner, or ale all turn out great. The beer steams the chicken from the inside, so the flavor doesn’t matter as much as having a full can.
What if my chicken tips over during cooking?
Use a few potato pieces to prop it up and keep it steady. The rack helps, but potatoes work just as well if the chicken seems wobbly.
Do I need a beer can chicken rack?
No, the rack makes things easier, but it’s not required. The aluminum pan alone works fine – just make sure the can sits firmly in the center and the chicken stays upright.
How do I know when the chicken is done without cutting into it?
Use a meat thermometer and check the thickest part of the thigh. It needs to reach 160 degrees F inside. This tells you it’s cooked through without any guessing.
Should I cover the chicken while it roasts?
No covering needed. Let it roast uncovered so the skin gets golden and crispy on all sides.
Beer Can Chicken Recipe
- Total Time: 13 hours 45 minutes to 14 hours 45 minutes
- Yield: 6 1x
Description
Beer can chicken is one of those dishes that seems complicated but honestly just requires you to prop a bird upright on a beer can and let your oven do the heavy lifting for perfectly crispy skin and juicy meat throughout.
Ingredients
Protein and poultry:
- 1 large chicken
- 1 tall slender can light beer
Seasonings and oils:
- 1 brine
- 1 spice rub for chicken
- 1 large sprig rosemary
- 1/4 cup vegetable oil
- 1 teaspoon kosher salt
- 1/2 teaspoon freshly ground black pepper
Vegetables:
- 8 small potatoes
- 3 small onions
- 4 ears of corn
Instructions
- Prepare your brine using half of a standard turkey brine recipe, then refrigerate it until completely cooled.
- Rinse your chicken thoroughly and remove the giblets and neck, then place it inside a large food-grade zip-top bag.
- Set the bagged chicken into a large pot to keep it upright, pour the cooled brine over it, seal the bag while removing excess air, and refrigerate for 12 to 24 hours.
- Mix together your chosen spice rub and set it aside.
- Position your beer can chicken rack into a disposable aluminum pan, then place that pan on a foil-lined sheet tray.
- Heat your grill or oven to 350 degrees Fahrenheit about 3 hours before you plan to serve dinner.
- Drain and discard the brine, rinse your chicken under cold water, pat it dry completely, and brush 2 tablespoons of vegetable oil across the outside skin.
- Pour out about 1/4 cup of beer from the can, insert a large rosemary sprig into the opening, remove and discard the pull tab, then place the can in the center of your rack or pan.
- Hold your chicken upright over a cutting board and coat it generously inside and out with the spice rub mixture.
- Slide the chicken over the beer can with the legs pointing downward, trim off the wing tips with kitchen shears and discard them, then check that the chicken sits firmly without tipping.
- Arrange your prepared vegetables around the bottom of the pan and around the chicken, using a few potato pieces to stabilize the chicken if needed.
- Brush the 8 halved or quartered small potatoes, 3 halved or quartered small onions, and 4 pieces of cut corn with the remaining 2 tablespoons of vegetable oil, then sprinkle them with 1 teaspoon of kosher salt and 1/2 teaspoon of ground black pepper.
- Roast your chicken in the 350-degree Fahrenheit grill or oven with the lid closed for 1 hour 30 minutes to 2 hours 30 minutes, depending on the chicken’s size, until the thickest part of the thigh reaches an internal temperature of 160 degrees Fahrenheit.
- Remove your roasted chicken from the heat and let it rest for 15 minutes covered loosely with foil, then return the vegetables to the pan during this resting time to brown and crisp them further.
- Carve and slice your chicken as you would any roasted bird, then plate it alongside the hot vegetables.
- Drizzle the pan drippings collected at the bottom over each portion before serving.
Notes
- Pat your chicken completely dry before applying the rub, as moisture prevents the seasoning from sticking properly to the skin.
- Check that your chicken sits upright without wobbling on the beer can, since an unstable bird cooks unevenly and risks tipping into the pan.
- Pull corn out halfway through cooking if it’s already tender, then return it during the last 15 minutes so the vegetables finish together without becoming mushy.
- Save the pan drippings and pour them over your carved chicken and vegetables, as this concentrated liquid adds rich flavor to every bite.
- Prep Time: 12 hours
- Cook Time: 1 hour 45 minutes to 2 hours 45 minutes
- Category: Roasted Chicken
- Method: Roasting
- Cuisine: American
Nutrition
- Serving Size: 6
- Calories: 378 kcal
- Sugar: 3 g
- Sodium: 418 mg
- Fat: 19 g
- Saturated Fat: 4 g
- Unsaturated Fat: 14 g
- Trans Fat: 0 g
- Carbohydrates: 21 g
- Fiber: 3 g
- Protein: 34 g
- Cholesterol: 110 mg
Julia Simon
Founder & Head Recipe Curator
Expertise
Seasonal and Globally Inspired Recipes, Flavor Pairing & Ingredient Creativity, Comfort Food with a Modern Twist, Recipe Testing & Home Kitchen Strategy, Simple Weeknight Ideas, Weekend Feast Ideas
Education
- Program: Culinary Arts Certificate
- Focus: Hands-on culinary training including classic cooking techniques, kitchen safety, and menu prep in a professional kitchen environment.
Tri-C Culinary Arts – Cuyahoga Community CollegeBased in Asheville, NC, Julia Simon leads Restaurante Kabuki with a love for seasonal ingredients and practical, flavor-forward cooking. She trained in Culinary Arts at Tidewater Community College and Tri-C Culinary Arts, building strong skills in classic techniques, kitchen safety, and professional prep. Julia has created 300+ original recipes designed for real home kitchens. Her style blends global inspiration with modern comfort food, making everyday meals and special occasions equally inviting. She believes cooking should feel joyful, approachable, and worth sharing.